How To Use A Milk Frother Wand
A milk frother wand is a small handheld frother tool that spins a whisk or screen in milk to add air and create foam. Get the depth and motion right, and you get glossy milk for a latte, cappuccino, or flat white. Get them wrong, and you get splashes, large bubbles, and foam that dies in the cup.
This guide walks through setup, wand position, drink styles, plant milks, cleanup, and the difference between a cheap coil whisk and a screen-style handheld milk foamer.
Make cafe-quality microfoam at home with milk tools built for real texture.
What a milk frother wand does

A frother wand does two jobs at once.
-
It pulls air into the milk. That is aeration.
-
It shears those bubbles into smaller ones and mixes them through the liquid. That is texturing.
A basic coil whisk is good at the first job. It beats air in fast and makes a thick cap of foam. That works for hot chocolate or a dry cappuccino top. It is weak at the second job. The bubbles stay large, sit on top, and do not pour like paint.
A screen-style wand, such as a NanoFoamer, forces milk through a fine mesh at high speed. The result is microfoam: tiny bubbles mixed into the milk so the whole pitcher looks shiny and pours in one stream. That is the texture you need for latte art. You can still use a simple wand. The steps below work for both. The same rules of depth, milk volume, and a quiet vortex apply either way.
What you need before you start
Skip fancy gear. You do need the right vessel and the right amount of milk.
Gear that helps
-
A tall, narrow milk jug. A wide mug splashes and makes a weak swirl.
-
Fresh milk, dairy or barista-style plant milk.
-
A way to warm milk if you want a hot drink. Stovetop, microwave, or an automatic heater all work.
-
A clean wand with a charged battery or fresh cells. Weak power makes lazy foam.
A FlowTip milk jug is built for this. The narrow body gives the wand enough depth. The sharp spout helps you pour a heart or tulip after you texture.
Milk volume
Fill the jug about one third full. Milk grows as air goes in. If the jug is too full, foam climbs over the rim. If it is too low, the head cannot stay under the surface and you get big bubbles. Aim for enough depth to hide the whisk or screen. On a narrow jug, that is roughly a finger and a half of milk.
How to use a milk frother wand, step by step
Do these steps in order. Most failed foam comes from skipping position, not from “bad milk.”
1. Warm the milk if the drink is hot
For a hot latte or cappuccino, warm milk first. Cold milk can foam, and many people use it for iced drinks. For hot drinks and pourable art, warm milk gives a sweeter taste and a silkier feel.
Heat gently. Stop when the jug is hot to the touch but you can still hold it. If the milk smells cooked or the bottom of the jug browns, it went too far. Milk proteins start to break down when the liquid gets too hot, and the foam turns thin and dull.
Barista trainers, including material taught through the Specialty Coffee Association path, treat this as a hard ceiling, not a suggestion. A stovetop-safe jug lets you warm and froth in the same pitcher. That cuts dishes and keeps the milk moving.
2. Purge or spin the wand first
Hold the wand over the sink. Switch it on for a second. Shake off rinse water so you do not water down the milk. This is a small step. It saves a flat, watery pitcher.
3. Place the head just under the surface
Hold the wand vertical. Put the whisk or screen just below the milk line, in the center of the jug.
-
Too high: milk sprays and you get soap-like bubbles.
-
Too low: the milk barely moves and little air goes in.
-
Just under the surface: you should see a small whirlpool form.
Keep the head off the bottom and off the wall. On a handheld electric frother, that starting height is what separates microfoam from bath foam.
4. Turn it on and stay still for a few seconds
Start on the higher speed if your wand has two speeds. Do not pump it like a piston. Let the motor work. Listen. A soft hiss or gush means air is going in. A scream or rattle means the head is too deep or touching metal. Raise it a hair.
This first phase is aeration. Short aeration gives a flat white style, with little extra volume. Longer aeration gives a cappuccino style, with a thicker foam layer. Watch the surface. Stop adding air when the milk has grown to the volume you want.
5. Lower the head and make a vortex
Once you have enough air, sink the head deeper and slide it toward the side of the jug. You want a steady spin, like water going down a drain.
This second phase is texturing. Large bubbles get pulled under and cut into tiny ones. The sound gets quieter. The surface turns from frothy to glossy. Keep tiny movements. Big circles smash the foam you just built.
6. Stop in the milk, then tap and swirl
Turn the wand off while the head is still in the milk. Pulling a spinning head out of the jug throws milk across the counter.
Lift it out. Tap the jug once on the counter. Swirl. The foam and liquid should look like one shiny mix, not a white cap sitting on thin milk. Pour soon. Microfoam is at its best right after you finish.
How to tell good foam from bad foam
Good foam from a steam wand looks wet and shiny. It stretches when you swirl the jug. It pours in a single ribbon and mixes with espresso instead of floating as a dry raft. Bad foam looks dull, with bubbles you can see from across the kitchen. It separates in less than a minute. It sits on the coffee like whipped cream.
Use this quick check:
-
Swirl the jug. The surface should heal and go glossy.
-
Tilt and pour a little back into itself. It should flow, not plop.
-
Look at the side of the jug. You should not see a thick white layer with gray milk under it. That means the air never mixed in.
If the foam is too stiff, you aerated too long or kept the head too high. Next pitcher, drop the head sooner. If the foam is too thin, stay near the surface a few seconds longer before you sink the wand.
Best milk for a frother wand
Whole dairy milk is the easiest to froth. Fat and protein hold tiny bubbles and give a sweet taste when the milk is warm, not scalded. Skim milk foams fast and looks tall. The foam is drier and breaks sooner. Fine for practice. Less fine for a silky flat white.
Barista oat, soy, and almond often beat regular plant cartons. Barista versions have extra protein or stabilizers so the foam holds. Regular almond milk can look foamy, then collapse. Oat is the plant milk many home users find most forgiving. Fresh milk beats milk that has sat open for days. Old milk still spins. It just will not hold a tight texture.
Cold milk straight from the fridge is the right start for most steam wands if you plan to heat it first, or if you want cold foam. For hot drinks, warm it, then froth. For iced drinks, froth cold and pour over ice and espresso.
How wand technique changes by drink
Same tool. Different air.
|
Drink |
Air you add |
Texture you want |
Pour style |
|
Flat white |
Short burst near the surface |
Glossy, little extra height |
Mix fully with espresso |
|
Latte |
Medium burst, then a long vortex |
Wet paint, easy to pour |
Heart or simple tulip |
|
Cappuccino |
Longer time near the surface |
Thicker cap, still fine bubbles |
Spoon or slow pour |
|
Macchiato |
Very little milk, short spin |
Small spoon of fine foam |
Dot the crema |
|
Iced latte / cold foam |
Cold milk, short surface time |
Dense cold foam |
Spoon or pour over ice |
|
Hot chocolate |
Warm milk, longer surface time |
Light, airy cap is fine |
Scoop on top |
A compact travel wand such as the NanoFoamer GO is handy when you also whisk matcha or mix a small protein drink. Pop the fine screen off for powders so the mesh does not clog. Keep the screen on when the goal is coffee microfoam.
For a tiny espresso macchiato, use a small jug. A large milk frothing pitcher with a splash of milk cannot form a vortex. A wand often beats a steam pipe for that small volume, because steam can scorch a few ounces before the texture is ready.
Common mistakes and how to fix them
The milk sprays. The head is too high or you turned the wand on above the surface. Submerge first, then power on. You hear a harsh grind. The head is on the bottom or the jug is too empty. Add milk or lift a little.
The foam is a pile of soap bubbles. You stayed on the surface too long and never made a vortex. Sink the head and hold a quiet spin until the big bubbles vanish. The milk is hot but tastes flat. It overheated. Next time, stop sooner. Sweetness fades when proteins break.
Nothing happens. Dead batteries, a clogged screen, or milk that is already scalding. Charge the wand, rinse the head, and start with cooler milk. Plant milk will not hold. Switch to a barista carton and use a slightly longer vortex, not more wild surface whipping.
You cannot pour art. The foam and milk are in two layers. Swirl harder. If it still splits, you have dry foam, not microfoam. Less surface time, more time with the head buried. Practice in water with a drop of dish soap if you want to save milk. The motion looks close enough to learn the vortex. Then switch back to milk. The latte art masterclass taught by Lance Hedrick covers that drill, plus hearts and tulips, for people who own a NanoFoamer or FlowTip jug.
How to clean a milk frother wand
Milk left on a whisk turns into a sour film. Clean as soon as you pour.
-
Fill a cup with warm water.
-
Run the wand in the water for a few seconds.
-
Wipe the shaft.
-
If your model has a clip-on screen, pull it off and rinse both sides.
-
Let it air dry. Put the cap or hood back on so the head does not pick up drawer dust.
Do not leave the wand soaking in the jug. Do not put the motor handle in the dishwasher. Rinse the working end only. If foam quality drops after many weeks, the screen or impeller may be worn or blocked. Spare parts exist for the screen-style tools, which is one reason they last longer than sealed toy whisks you have to throw away. A weekly deeper rinse with warm soapy water keeps fat from building up in the mesh. Rinse the soap off fully. Soap left in the screen makes milk taste odd and foam collapse.
Milk frother wand vs steam wand vs automatic frother
People mix these tools up. They are not the same.
Handheld wand. You control air by depth and time. You heat milk in a separate step, unless you buy a heated automatic unit. It is small, cheap to run, and easy to store. Skill matters. A rechargeable milk frother keeps that skill consistent because the motor does not fade mid-pitcher.
Espresso steam wand. Steam heats and textures at the same time. It is fast in a cafe. At home, it needs a machine with enough boiler power, a purge step, and practice with pitch and sound. Steam also adds water to the milk.
Automatic jug frother. You pour milk, pick a program, and wait. Little technique. Less control over the exact sheen you want for art, unless the machine is built for microfoam rather than cappuccino froth.
If you already pull espresso on a machine with no steam wand, a pod machine, a moka pot, or an AeroPress, a wand or an automatic microfoam maker fills the gap. The products for milk collection group the handheld frother and automatic frother options so you can match the tool to how much work you want to do each morning.
A steam wand still wins on raw speed in a busy cafe. For a single home drink, a good wand is often cleaner and easier to repeat. You are not waiting for a boiler or wiping a hot pipe after every cup.
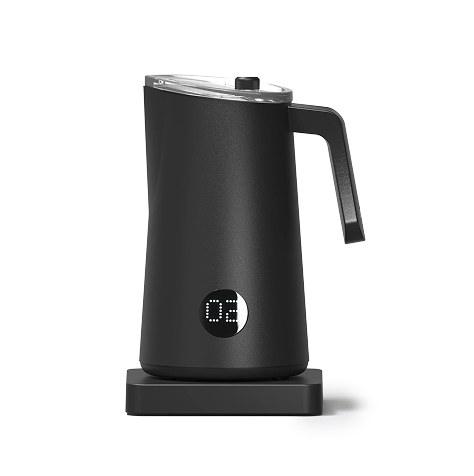
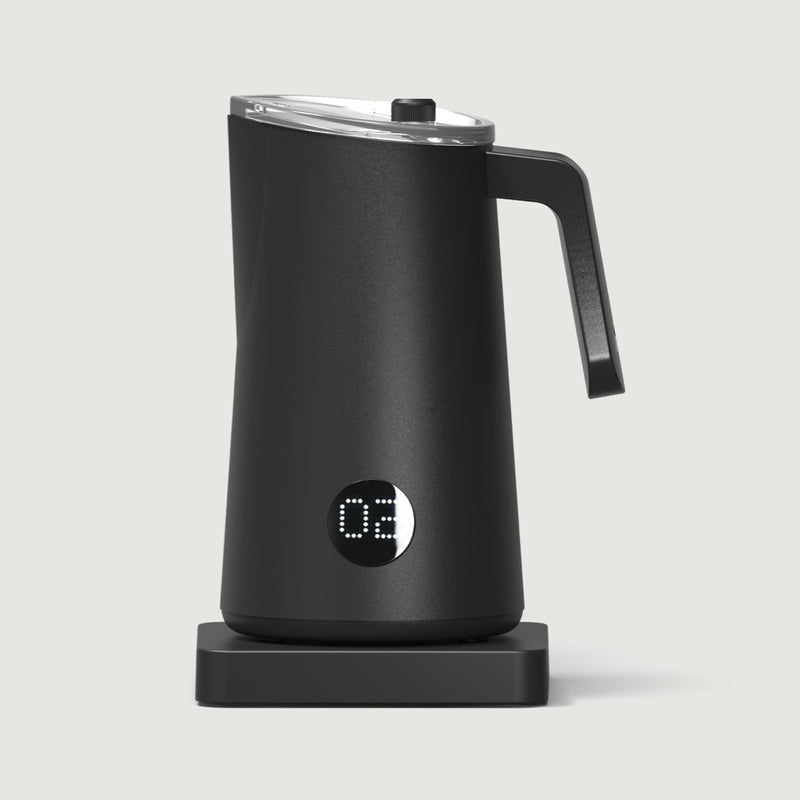
If you want heated milk and foam in one step, the NanoFoamer PRO sits in that automatic group. It uses a magnetic impeller and flow controllers for dairy and plant milks, so you are not guessing with a coil disc. Use the wand when you want portable control. Use the automatic jug when you want to pull a shot with both hands free.
How Subminimal tools change the wand method
Subminimal builds wands and jugs for microfoam, not party foam. That sounds like marketing until you use a coil whisk and a screen wand side by side.
NanoFoamer Go

Description (NanoFoamer Go):
The compact handheld milk foamer built for real results. We took the world’s best handheld milk foamer, made it smaller, more powerful, and even more versatile. The NanoFoamer GO delivers silky, latte art quality microfoam that rivals commercial espresso machines.
What it does
-
Creates professional microfoam for coffee
-
Mixes protein shakes and matcha
-
Whisks cream, eggs, sauces, and desserts
Three interchangeable impellers give you Mix, Foam, and Whisk modes. Two speeds let you fine tune texture every time.
Power and performance
-
Up to 5,300 RPM high speed
-
4,200 RPM low speed
-
Patented NanoScreen technology
-
Silky liquid velvet microfoam in seconds
Built for everyday and travel
-
Ultra compact at just 76g
-
USB-C rechargeable
-
IPX-4 water resistant for easy rinsing
-
Matching travel case included
-
Available in 10 colours
Every purchase also unlocks exclusive access to the Subminimal latte art masterclass. Whether you want café style flat whites at home, cold foam for iced drinks, or a versatile tool for mixing and whisking, the NanoFoamer GO is designed to perform without the bulk or complexity of traditional gear.
NanoFoamer PRO

Description (NanoFoamer PRO):
Unlock the secret to velvety-smooth, café-style microfoam—without the espresso machine. The NanoFoamer PRO GEN-2 is the ultimate hands-free microfoam maker, designed for coffee lovers who want professional results at home, fast and effortlessly. Whether you're using dairy or plant-based milk, this precision-engineered device transforms your morning routine into a café-quality experience.
Why You’ll Love It
✅ Automatic & Hands-Free – Heat and foam your milk at the same time you're pulling your shot.
✅ Barista-Level Microfoam – Create rich, silky microfoam perfect for latte art.
✅ Works with All Milks – Dairy, oat, almond, soy—thanks to 3 optimized flow controllers.
✅ 5 Custom Programs – Tailor foam thickness and temperature to your drink of choice.
✅ Whisper-Quiet – Smooth operation with magnetic impeller height adjustment for perfect vortex control.
✅ Easy to Clean – IPX-5 water-resistant. Rinse it under the tap—no fuss.
✅ Portable & Sleek – Compact design that fits any kitchen setup.
What’s Included
- NanoFoamer PRO GEN-2 (EU Plug - 220V)
- 3 Flow Controllers (Black for dairy, Blue/Green for plant-based milks)
- Impeller height adjuster
- Free Latte Art MasterClass
- 30-Day Guarantee
- 1-Year Limited Warranty
Product Specs
- Dimensions: 12 × 12 × 20 cm
- Weight: 800g
- Power: 400W
-
Voltage: 220V (EU Plug)
-
Capacity: 100–220 ml
-
Water Resistance: IPX-5
-
Cord Length: 70 cm
The NanoFoamer PRO Gen-2 is engineered for perfectionists, busy mornings, and passionate home baristas alike. Ditch the noisy steam wands and inconsistent frothers—Subminimal brings you microfoam that rivals your favorite café, right at home.
NanoFoamer

Description (NanoFoamer):
Create silky, café-style microfoam in seconds with the Subminimal NanoFoamer – the world’s best handheld milk foamer designed for serious home baristas. Whether you’re perfecting a cappuccino, crafting a creamy flat white, or elevating your matcha latte, the NanoFoamer delivers superfine microfoam worthy of any coffeehouse.
Why NanoFoamer?
-
True Microfoam Technology – Unlike standard frothers, the NanoFoamer creates invisible microbubbles that result in smooth, velvet-like milk – perfect for latte art.
-
Battery or Rechargeable Options – Choose between the V2 (AA battery-powered) or the upgraded Lithium (USB-C rechargeable) model with dual-speed settings.
-
Compatible with Dairy & Milk Alternatives – Designed to work beautifully with barista-style oat, almond, soy, or dairy milks.
-
Easy to Use, Easier to Clean – Waterproof and intuitive, with upgraded clip-on NanoScreens and a replaceable polycarbonate impeller for durability and performance.
What’s Included:
-
NanoFoamer (V2 or Lithium)
-
2 NanoScreens: Fine & Superfine
-
Protective Hood
-
Wall Mount
-
Free Latte Art Masterclass
Technical Specs:
|
Feature |
V2 |
Lithium |
|
Power |
2 × AA Batteries |
USB-C Rechargeable (1300mAh) |
|
Speed |
3,000 RPM |
Dual Speed: 3,000 & 4,000 RPM |
|
Weight |
104g |
135g |
|
Waterproof |
✅ |
✅ |
|
NanoScreens |
Fine & Superfine |
Fine & Superfine |
|
Impeller |
Replaceable Polycarbonate |
Replaceable Polycarbonate |
Subscale

Description (Subscale®):
Precision dosing forms the foundation of great espresso and pour over coffee. A reliable scale paired with your workflow removes guesswork and improves consistency shot after shot. The Subscale combines a dosing cup and digital scale into one elegant device. It simplifies the entire bean to brew process with a hidden display that appears only when needed.
Standout Features of the Subscale
-
Touch activated invisible LED display that reveals weight readings on demand
-
Direct bean dosing into the cup before pouring straight into your grinder
-
USB C rechargeable battery with smart auto shutoff to conserve power
-
IPX4 splash resistance for easy cleaning after use with liquids or grounds
-
Compact minimalist design that reduces clutter on any coffee station
-
Support for grams or ounces with quick switching and calibration option
Benefits for Daily Coffee Rituals
-
You eliminate extra bowls and separate scales from your routine.
-
The single vessel approach speeds up dosing while keeping everything accurate and repeatable.
-
It works seamlessly for espresso single dosing as well as other brewing methods like French press or tea.
-
The futuristic reveal of the display adds a small moment of delight to morning preparation.
Build a Cleaner More Efficient Setup
Home baristas appreciate how one tool replaces two and keeps the workspace tidy. Whether you measure for a double shot or adjust for lighter roasts, the Subscale delivers.
Flick WDT Tool

Description (Flick WDT Tool):
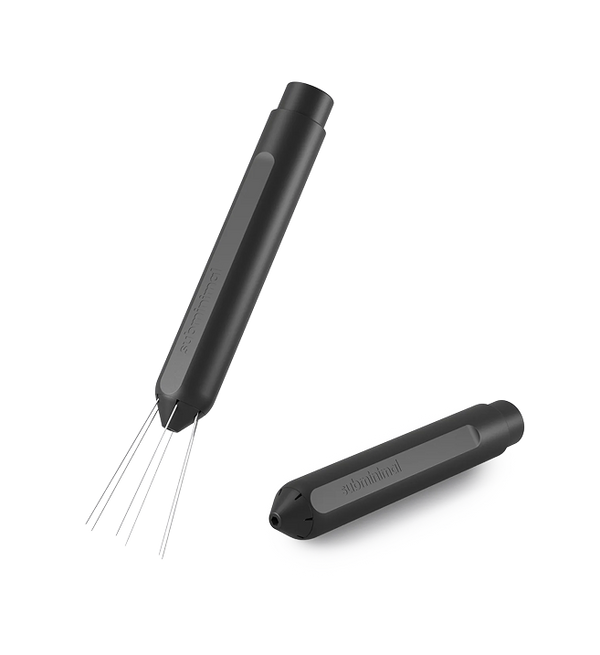
The Subminimal Flick isn’t just another WDT tool, it’s a game-changer for espresso lovers. Designed with an intuitive one-click needle release and flick-to-retract mechanism, this tool makes coffee preparation feel like second nature. No more bent, exposed needles. Just clean, controlled distribution with every shot.
Crafted for those who love both form and function, the Flick’s sleek metal body feels great in your hand, while the magnetic storage keeps it right where you need it, whether on your espresso machine or mounted on your wall.
Whether you're just starting out or pulling pro-level pours, the Flick transforms your workflow into a smooth, satisfying ritual. And yes, it’s as addictive as it is effective.
Why You'll Love It:
-
Retractable Needles: Safe, secure, and out of the way when not in use.
-
Magnetic + Stand Storage: Display it your way, upright or mounted.
-
All-Metal Construction: Premium feel, long-lasting durability.
-
Replaceable Needles: Comes with two full extra sets.
-
Compact & Travel-Friendly: Perfectly portable in its custom-fit box.
-
Hyper-Satisfying Use: Like a fidget spinner for baristas, seriously.
What’s in the box:
-
Flick WDT Tool
-
Weighted Aluminium Base
-
Wall/Machine Magnetic Mount
-
Two Sets of Replacement Needles
-
Allen Key Tool
Specs:
-
Weight: 48g / 1.3oz
-
Needle Thickness: 0.5mm
-
Needle Length: 42mm
-
Dimensions: 110 x 18 x 18mm
FlowTip Milk Jug

Description (FlowTip Milk Jug):
The milk pitcher designed for precise latte art and everyday comfort. Most jugs force a choice between control and comfort. The FlowTip delivers both.
Precision pouring
-
Patented FlowTip spout for smooth, accurate flow
-
Refined tip for sharp finishing details
-
Smooth neck that supports clean, controlled pours
-
Balanced weight and shape that feels natural in the hand
Two versions to choose from
-
Handle version with ergonomic, heat-resistant grip for stovetop use
-
Handleless version with insulating silicone sleeve for a connected feel
Both options keep your hands comfortable even as the milk heats. Focus stays on the pour, not on hot metal.
Built for real use
-
Stainless steel construction
-
Available in matte black or white
-
Recommended capacity around 180 ml
-
Total volume 450 ml
-
Dishwasher safe
Heat, texture, and pour in one simple workflow. Whether you are learning basic hearts or refining advanced designs, the FlowTip helps the milk go exactly where you want it. Every purchase includes access to the Subminimal latte art masterclass.
Discover Subminimal products and elevate every drink.
Discover Also:
Troubleshooting by sound and look
Your ears tell you more than a timer.
-
Gush at the start: air is going in. Good for the first phase.
-
Quiet swirl later: bubbles are getting small. Good for the second phase.
-
Screech: tip is too deep or milk is gone. Lift or add milk.
-
Splash hits your hand: tip broke the surface. Lower it.
-
Milk climbs the wall in one spinning sheet: vortex is right.
-
Foam sits still on top while liquid spins under it: you have two layers. Keep texturing.
Stop when the jug feels hot, and the surface looks like wet paint. Extra spinning after that point does not help. It can knock the foam back into liquid. Pour with the milk jug close to the espresso at first, then lift a little to draw a simple shape. If the design smears, the milk is too thin. If it sits in a blob, the milk is too stiff. Adjust air next time, not your wrist first.
FAQ
How long should I run a milk frother wand?
Run a milk frother wand only as long as the texture needs, not until the motor feels “done.” The first phase is a short stretch near the surface to add air. The second phase is a longer, quieter vortex with the head buried so those bubbles turn into microfoam. A flat white needs less surface time than a cappuccino. Watch shine and height, then switch the wand off while the head is still in the milk so the last second does not spray across the bench.
Can I froth milk in a regular mug?
A regular mug works for a quick weekday cap if you keep the fill low and the head off the ceramic. The wide shape weakens the whirlpool, so big bubbles show up faster than they do in a narrow milk jug. For pourable latte texture, the taller pitcher gives the wand walls to spin against and a spout that can drop a heart into espresso. Same wand, better vessel, cleaner foam.
Why does my frother wand make big bubbles even with whole milk?
Whole milk can still make soap bubbles when the head skates on the surface or the jug is too empty to hide the screen after aeration. Add enough milk for depth, sink the head, and hold a side vortex until the surface goes glossy. Weak batteries and a dirty mesh cause the same look, so rinse the head and give a rechargeable milk frother a full charge before you blame the carton. If foam quality stays coarse after a clean rinse, a worn screen from spare parts is often the missing piece.
Does a milk frother wand work for cold foam?
Yes. Keep the milk fridge-cold, add a short burst of air at the surface, then bury the head to tighten the bubbles. Cold foam is denser than hot microfoam and sits well on iced espresso or cold brew. Barista oat and other milk alternatives often hold that cold layer better than a thin regular carton. Pour or spoon it on soon after you stop the wand, while the foam is still tight.
What is the difference between a frother wand and a NanoFoamer?
A generic frother wand is usually a battery stick with a coil whisk. It adds air fast and is fine for a fluffy cap. A NanoFoamer is still a wand, but the head is an impeller with clip-on screens that shear milk into pourable microfoam. That is why it sits with other products for milk built for flat whites and latte art, not only hot-chocolate foam. If you want heat and texture in one hands-free jug instead of a handheld milk frother stick, the NanoFoamer PRO uses the same microfoam idea in automatic form.
Read Also:
Make cafe-quality microfoam at home with milk tools built for real texture.
Related to this blog:
The milk is frothed perfectly! This is an ultimate barista, and the temperature is exactly right! Any other devices that we tried cannot warm up the milk to more than 60 degrees, which makes the coffee average, but this one is mixing the foam and it is perfect for busy mornings! Looooove it!