How to Make the Perfect Espresso Macchiato at Home
An espresso macchiato is one of the purest coffee drinks you can make. It starts with a strong, well-extracted shot of espresso and finishes with just a small mark of milk foam on top. The name itself means “stained” or “marked” in Italian. That tiny amount of foam softens the intensity without turning the drink into a latte.
Many home baristas struggle with the foam texture or end up adding too much milk. The good news is that the process is simple once you understand the ratios and the right tools. A quality handheld milk frother makes the small amount of foam easy and consistent.
If you're exploring espresso-based drinks, it's worth understanding how a macchiato compares with other small milk coffees. While they may look similar at first glance, the milk-to-espresso ratio and texture create noticeably different flavor profiles. This guide to the differences between a piccolo, cortado, and macchiato explains what sets each drink apart, making it easier to choose the style that best matches your taste.
Make cafe-quality microfoam for your perfect espresso macchiato at home with Subminimal tools.
What an Espresso Macchiato Really Is

A traditional espresso macchiato is espresso first and milk second. You pull a single or double shot into a small demitasse cup. Then you add one or two teaspoons of milk foam. The foam sits on the crema like a soft cloud. The drink stays bold and coffee-forward.
This is different from a latte macchiato, which is mostly steamed milk with espresso poured through the foam. It is also different from the caramel macchiato popular at large chains. Those versions use much more milk, syrup, and sauce. The classic Italian version keeps things minimal so the espresso flavor stays clear. The small size and low milk volume make it a great choice when you want the taste of espresso with just a touch of sweetness and texture from the foam.
If you enjoy classic espresso drinks, it's also worth exploring how different regions have developed their own coffee traditions. For example, the Melbourne Magic coffee is an Australian favorite that balances a double ristretto with silky steamed milk, offering a richer texture while still letting the espresso remain the star of the cup.
Ingredients That Matter
You need only two things: good espresso and fresh milk.
For the coffee, choose freshly roasted beans ground just before brewing. Medium to medium-dark roasts with chocolate or nut notes work well because they balance the slight sweetness of the foam. Grind fine enough for proper espresso extraction. Too coarse and the shot runs watery. Too fine and it chokes the machine.
For the milk, whole milk produces the richest, most stable foam. The fat content helps create small, creamy bubbles. If you prefer plant-based options, unsweetened oat or barista-blend almond milks often foam better than thinner versions. Start with cold milk straight from the fridge. Cold milk holds air better and gives you more control. Use filtered water for the espresso if your tap water has strong mineral taste. Clean water lets the coffee flavor come through cleanly.
The quality of your espresso beans and milk doesn't just affect hot drinks; it also makes a noticeable difference in chilled coffee recipes. If you're looking to put your freshly brewed espresso to another delicious use, try this Mont Blanc iced coffee recipe, which highlights the same importance of balanced espresso and creamy milk textures in a refreshing format.
Equipment for Reliable Results at Home
You do not need a full commercial setup. A basic home espresso machine or a good quality lever or capsule system can pull a solid shot. What matters more is consistency in dose, grind, and tamping.
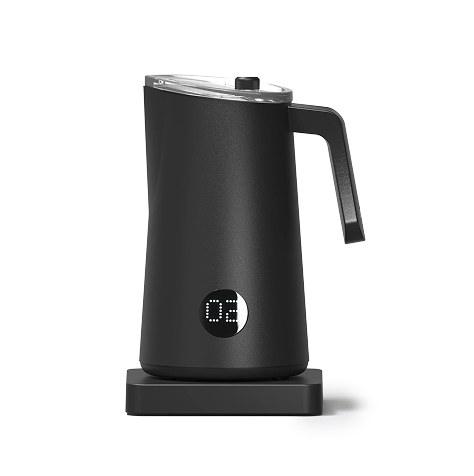
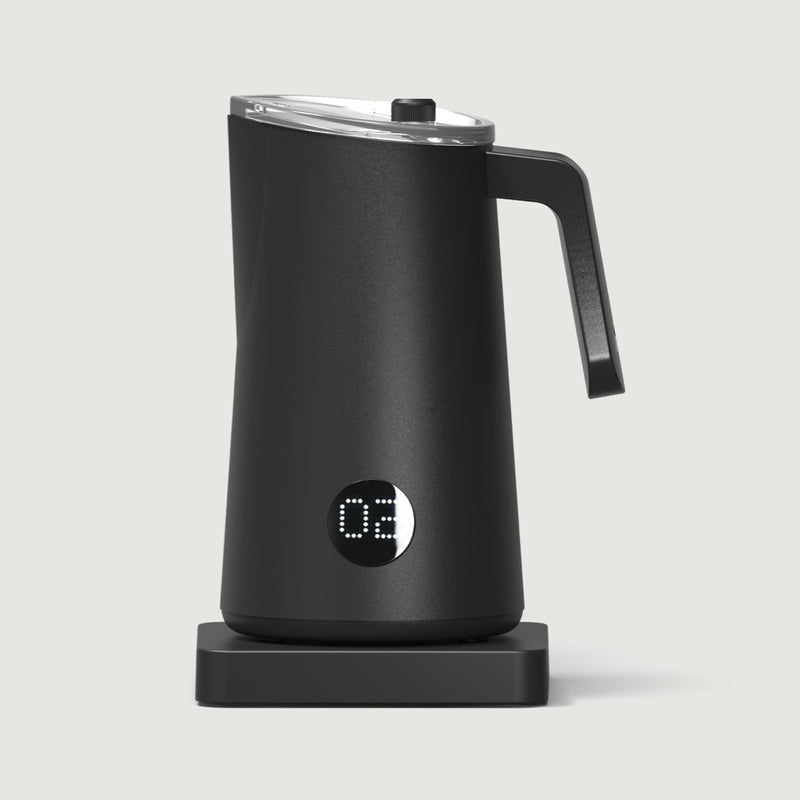
For the foam, many people struggle with steam wands on entry-level machines. The wand can overheat small amounts of milk or create large bubbles. This is where dedicated frothing tools shine. A NanoFoamer creates fine microfoam without a steam wand. It works well for the tiny volume needed for a macchiato. The NanoFoamer PRO takes it further by heating and texturing automatically, which is useful when you want repeatable results with less practice.
A small stainless steel milk jug helps with control. The FlowTip Milk Jug is designed for precise pouring, which is helpful even when you only need a spoonful of foam. A simple digital scale for coffee dosing and a thermometer for milk temperature round out the basics. Keep everything clean. Old milk residue or coffee oils can ruin the next drink.
Step-by-Step Method for a Perfect Cup
-
Prepare your espresso.
-
Preheat your machine and demitasse cup.
-
Weigh beans or grounds with the Subscale digital dosing cup (built-in precision scale + LED display) for consistent single or double shots.
-
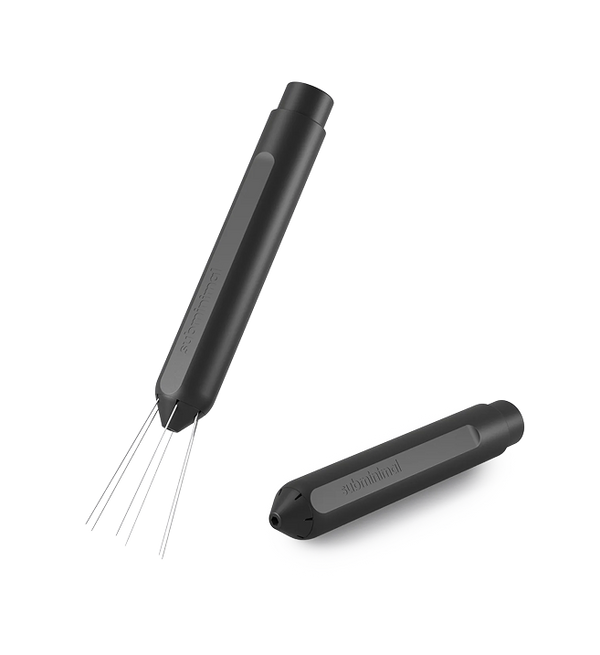
Use the Flick WDT Tool to stir and level the grounds in the portafilter, breaking up clumps for even distribution. This makes any good tamper more effective, delivering a steady extraction with rich crema, the strong base of a true espresso macchiato.
-
Texture a small amount of milk.
-
Pour cold whole milk (or a good barista plant milk) into a small jug.
-
Use the NanoFoamer or NanoFoamer PRO to create a light, dry foam. Aim for just enough volume to yield one or two teaspoons. The fine texture these tools produce sits cleanly on the crema without flooding the cup. A FlowTip Milk Jug helps control the small amount of foam more precisely.
-
Assemble the drink. Once the espresso has settled with a good crema layer, gently spoon one or two teaspoons of the prepared foam onto the center.
-
Serve immediately while both the crema and foam are fresh.
Discover Subminimal Products to Make the Perfect Espresso Macchiato at Home
NanoFoamer PRO
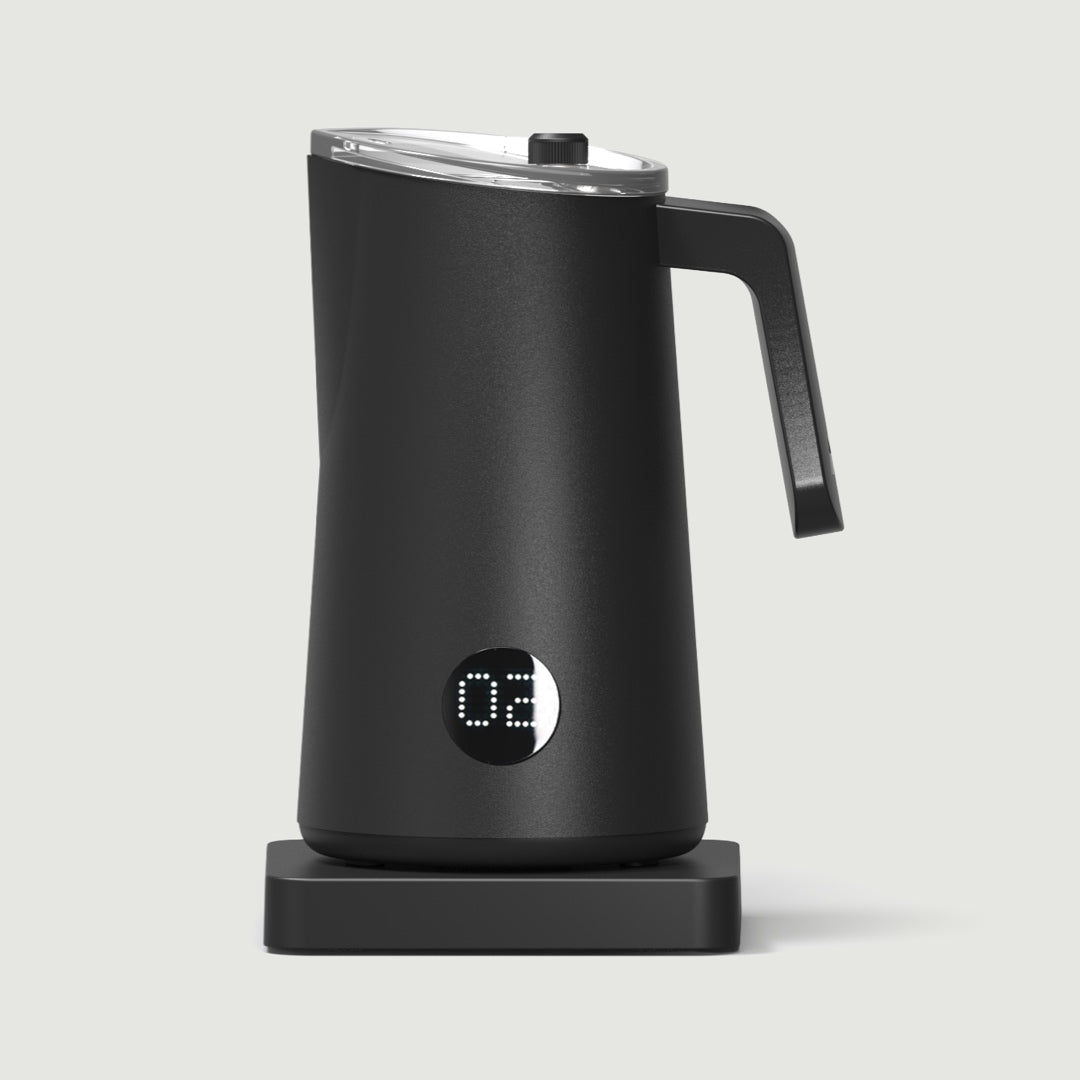
Description ( NanoFoamer® PRO ):
Creating cafe-quality microfoam at home has become simpler than ever.
Many coffee enthusiasts now rely on dedicated devices instead of struggling with basic frothers or expensive steam wands. The Nanofoamer Pro stands out as a complete solution for heating and texturing milk in one step. It produces the fine, stable microfoam that transforms ordinary espresso into smooth lattes and eye catching cappuccinos.
What Sets the Nanofoamer Pro Apart
-
Hands free operation with intuitive push button controls and multiple preset programs
-
Smart flow controllers that match different milk viscosities for reliable results every time
-
Fine adjustable impeller height for perfect vortex control in small or large batches
-
Robust build with double walled jug and high temperature accuracy
-
Easy maintenance thanks to IPX5 water resistance and thoughtful design details
Why Microfoam Quality Matters
-
True microfoam feels silky on the tongue and integrates flavor without large bubbles.
-
It holds patterns for latte art far better than the dry stiff foam from basic frothers.
-
Home users notice the upgrade immediately in taste and presentation.
-
The device handles both cow milk and popular alternatives with the right controller choice.
-
Fit It Into Any Coffee Station
-
Its compact footprint works alongside manual espresso makers, pod machines, or even simpler setups like Aeropress and Moka pots.
Subscale
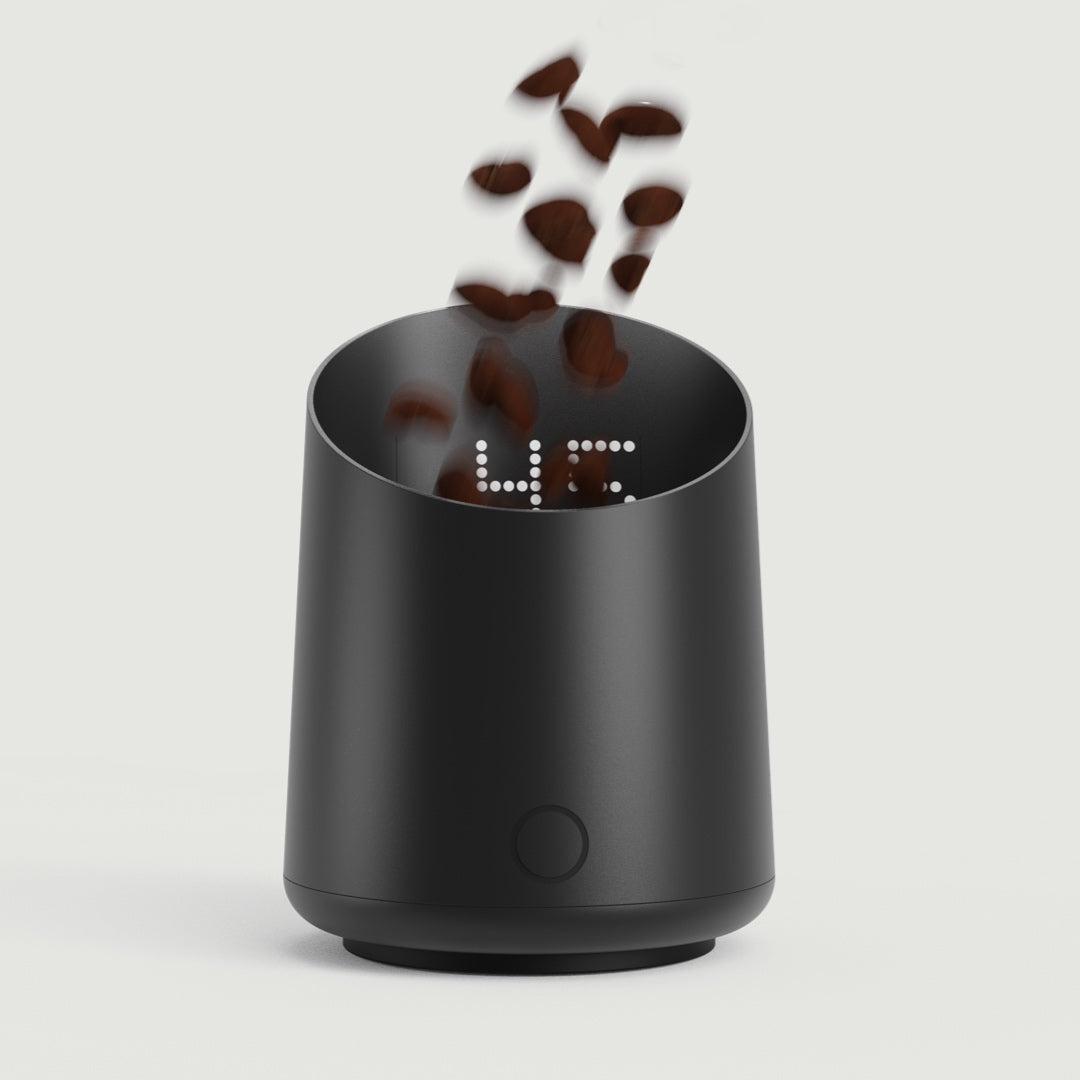
Description (Subscale®):
Precision dosing forms the foundation of great espresso and pour over coffee. A reliable scale paired with your workflow removes guesswork and improves consistency shot after shot. The Subscale combines a dosing cup and digital scale into one elegant device. It simplifies the entire bean to brew process with a hidden display that appears only when needed.
Standout Features of the Subscale
-
Touch activated invisible LED display that reveals weight readings on demand
-
Direct bean dosing into the cup before pouring straight into your grinder
-
USB C rechargeable battery with smart auto shutoff to conserve power
-
IPX4 splash resistance for easy cleaning after use with liquids or grounds
-
Compact minimalist design that reduces clutter on any coffee station
-
Support for grams or ounces with quick switching and calibration option
Benefits for Daily Coffee Rituals
-
You eliminate extra bowls and separate scales from your routine.
-
The single vessel approach speeds up dosing while keeping everything accurate and repeatable.
-
It works seamlessly for espresso single dosing as well as other brewing methods like French press or tea.
-
The futuristic reveal of the display adds a small moment of delight to morning preparation.
Build a Cleaner More Efficient Setup
Home baristas appreciate how one tool replaces two and keeps the workspace tidy. Whether you measure for a double shot or adjust for lighter roasts, the Subscale delivers.
Flick WDT tool
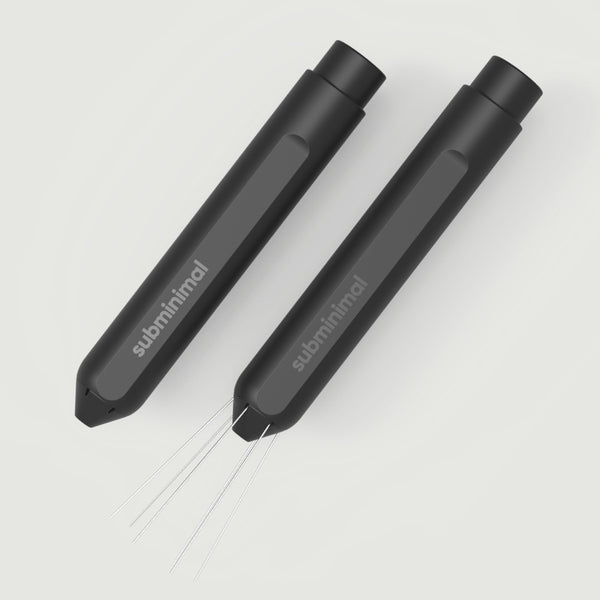
Description (Flick® WDT Tool):
Even distribution of coffee grounds in the portafilter plays a critical role in extraction quality. Uneven puck prep often leads to channeling and inconsistent shots. The Flick WDT tool turns this essential step into a safe and surprisingly enjoyable part of the process. Its retractable needle design solves common frustrations with traditional distribution tools.
What Makes the Flick Different
-
One click mechanism that pops needles out instantly for immediate use
-
Simple wrist flick to retract needles safely after distribution work
-
Thin replaceable needles that break up clumps without disturbing the puck structure
-
Versatile mounting options including a stand or magnetic attachment to machines
-
Lightweight and portable design perfect for home use or travel
-
Comes with spare needles and tools for long term maintenance
Benefits for Better Espresso
-
Proper distribution promotes even water flow through the grounds.
-
This leads to sweeter, more balanced shots with better body and crema.
-
The safety aspect means no more worrying about bent needles or accidental pokes during storage. Users find the motion addictive and look forward to this part of their workflow.
Upgrade Your Puck Preparation
Whether you use a bottomless portafilter or standard setup, the Flick integrates smoothly.
It supports both wet and dry distribution techniques depending on your preference.
Experience the magic of great coffee by checking out Subminimal.
Discover Also:
Getting the Foam Texture Right
Foam quality separates an average macchiato from a great one. The ideal foam for this drink is light and airy rather than dense and stretchy. Think of the texture of soft whipped cream that still holds its shape on a spoon.
Temperature plays a big role. Warm the milk gently so it feels hot but not scalding. Too hot and the proteins break down, leaving flat or grainy foam. Many home baristas find the sweet spot around the temperature where the milk jug is warm to the touch but still comfortable to hold.
Practice with small batches. Over-aerating creates big bubbles that look pretty at first but collapse quickly. Under-aerating leaves the milk too liquid. A few sessions with a good frother help you learn the exact feel. The interchangeable screens on certain frothers let you adjust density, which is useful when switching between a dry foam for macchiato and silkier microfoam for other drinks. Whole milk usually needs less work than skim or some plant milks.
Common Mistakes and How to Fix Them
Adding too much milk is the most frequent error. The drink stops being a macchiato and becomes a small latte. Stick to the spoon method rather than pouring freehand until you develop a feel for the tiny amount. Using old or poorly extracted espresso ruins the base. Bitter or sour shots cannot be fixed by foam. Focus on fresh beans and proper extraction first.
Another common issue is creating milk foam with large, airy bubbles instead of a smooth, velvety microfoam. Even though an espresso macchiato uses only a small amount of foam, proper steaming technique makes a noticeable difference in both texture and presentation. These tips on perfecting milk steaming techniques for latte art can help you produce consistently silky foam for better macchiatos.
Skipping the tap-and-swirl step leaves large bubbles that look messy and taste thin. Always settle the foam before spooning. Serving in a large mug changes the experience. The small demitasse keeps the proportions correct and the temperature higher for longer. Rushing the process also hurts results. Give the espresso a moment to settle its crema before adding the foam.
Milk Choices and Temperature Control
Different milks behave differently. Whole dairy milk remains the most forgiving and produces the creaminess that pairs best with bold espresso. Lower-fat dairy milks create lighter foam that may need slightly more aeration.
Among plant options, oat milk often comes closest to dairy in body and sweetness. Some almond and soy blends work well if they are designed for coffee. Test a few brands because formulations vary.
Temperature control prevents scorching. Milk that gets too hot loses sweetness and can taste cooked. A simple thermometer or even careful attention to the jug temperature helps. For more guidance on this, the principles in Subminimal’s notes on perfect milk temperature apply directly to the small volumes used here.
Tools That Make Home Macchiato Easier
Home baristas often hit limits with basic equipment when they want consistent foam in tiny amounts. This is where focused tools help. The NanoFoamer creates the fine texture needed without relying on a steam wand that may be too powerful or inconsistent for small volumes. The NanoFoamer PRO adds heating and programmed cycles so you can set it and get repeatable results.
Pairing either with a FlowTip Milk Jug gives better control when transferring the foam. These tools sit in the broader range of products for milk designed specifically for home use. For those who also care about espresso preparation, items in the products for coffee collection support better dosing and distribution.
Frequently Asked Questions
Can I make an espresso macchiato without an espresso machine?
Yes, you can create a solid version at home even without a dedicated espresso machine. A moka pot produces a strong, concentrated coffee that works well as the base, while an AeroPress can deliver a bold shot if you use a fine grind and short brew time. The key is keeping the coffee intense so the small amount of milk foam still marks the drink rather than diluting it. Pair that concentrated base with carefully prepared foam using a simple milk frother and you still get the classic espresso-forward character of a traditional espresso macchiato.
How much foam is the right amount?
The traditional espresso macchiato calls for just one or two teaspoons of milk foam spooned gently on top of the crema. This small mark softens the intensity of the espresso without turning the drink into something milkier. Adding more liquid milk or a thick layer of foam changes the balance and moves the drink away from the classic Italian style. Practice with a light, dry foam texture so it sits cleanly on the surface rather than sinking or mixing too quickly.
Why does my foam disappear so quickly?
Foam that collapses fast usually comes from large bubbles, milk that got too hot, or a milk type that does not hold air well. Creating smaller bubbles by controlling the frothing motion and stopping at the right moment helps the foam stay stable longer. Whole milk or well-formulated barista plant milks tend to produce more durable texture. Settling the foam by tapping the container and swirling also removes excess air and improves how long the mark lasts on your espresso macchiato.
Is a macchiato the same as a cortado or piccolo?
No, these three drinks differ clearly in milk volume, foam style, and overall balance. An espresso macchiato keeps the least milk, using only a small spoonful of light foam on a full espresso shot. A cortado blends roughly equal parts espresso and steamed milk with almost no foam, while a piccolo uses a ristretto base topped with a larger amount of silky microfoam.
What is the best way to clean frothing tools after making a macchiato?
Rinse the milk frother and jug right after use with warm water before any milk residue dries. For handheld models, wipe the whisk and shaft thoroughly; for automatic units, follow a quick rinse or cleaning cycle. Dried milk proteins can affect the next batch of foam and create off flavors. Keeping tools clean also makes it easier to achieve consistent results when preparing the small volumes of foam needed for an espresso macchiato.
Read Also:
-
Foamed Milk at Home: A Comprehensive Guide to Frothing Milk Perfectly
-
Perfecting Your Latte Art with These Milk Steaming Techniques
Related to this blog:
The milk is frothed perfectly! This is an ultimate barista, and the temperature is exactly right! Any other devices that we tried cannot warm up the milk to more than 60 degrees, which makes the coffee average, but this one is mixing the foam and it is perfect for busy mornings! Looooove it!